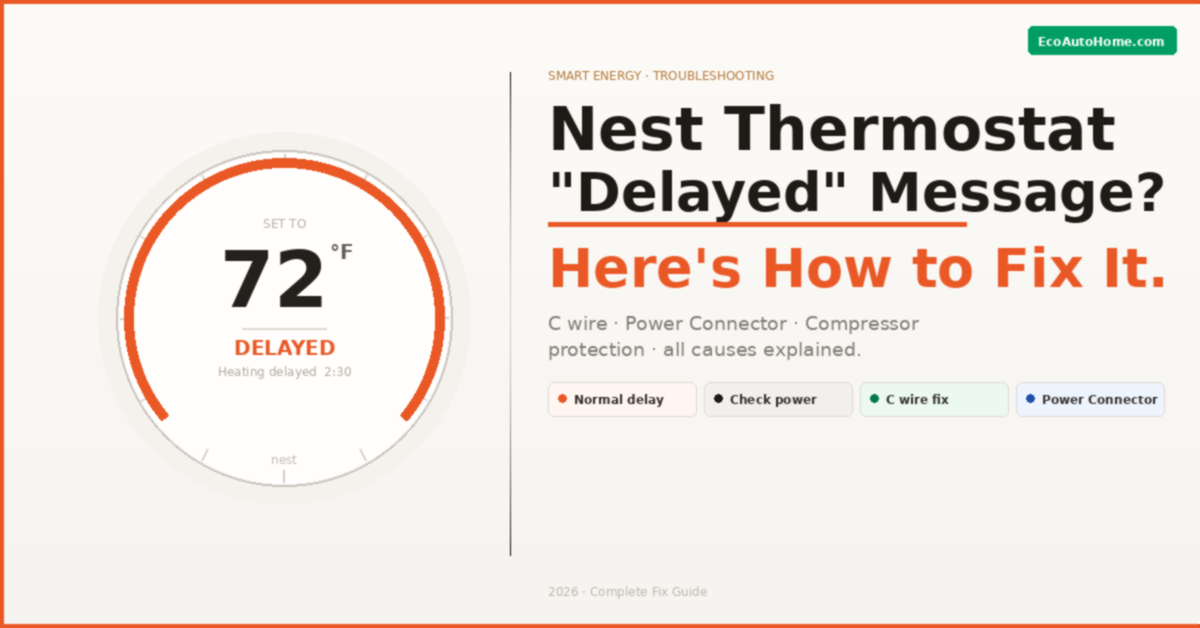
You walk over to your Nest thermostat, bump up the heat, and instead of your furnace kicking in — you see it. A countdown. “Heating is delayed for 2:30 mins.” Or sometimes just the word “Delayed” sitting there with no explanation at all.
What does it actually mean? Is something broken? Should you be worried?
Here’s the honest answer: sometimes it’s completely normal, and sometimes it’s a warning sign your system needs attention. The tricky part is knowing which situation you’re in — because Nest uses the same “Delayed” message for both. I’ve personally worked through this on multiple Nest installations and the fix almost always comes down to one of four root causes. This guide walks you through every single one, in plain English, so you can stop guessing and start fixing.
What Does “Delayed” Actually Mean on a Nest Thermostat?
Before jumping into fixes, it helps to understand what Nest is actually telling you — because the message covers two very different situations.
Type 1 — The Normal Delay (Nothing is Wrong) When you run an air conditioner or heat pump, the compressor inside the outdoor unit needs time to equalise its internal pressure before starting up again. If it starts too quickly after shutting off, it can burn out prematurely. According to Google’s own Nest support documentation, Nest builds in a short protective delay — typically 2 to 5 minutes — to prevent this kind of compressor damage. This is called short cycling protection, and it’s a feature, not a fault.
If you see “Delayed for 2:30 mins” shortly after your AC has just turned off, that’s almost certainly this. Wait it out and your system will start normally once the countdown reaches zero.
Type 2 — The Problem Delay (Something Needs Fixing) If the delay message appears when your system hasn’t recently run, lasts longer than 5 minutes, keeps repeating in short cycles, or is accompanied by your home not reaching the target temperature — that’s a different story entirely. That’s your Nest telling you it doesn’t have enough power to run your HVAC system reliably. And that’s what the rest of this guide is about.
The Real Root Cause Behind Most Nest Delayed Messages
Here’s the part most people don’t understand — and that most guides don’t explain clearly enough.
Nest thermostats aren’t powered the same way a traditional thermostat is. They contain a built-in rechargeable lithium-ion battery that powers all their smart functions — Wi-Fi, motion sensing, learning algorithms, the display, and everything else. That battery has to stay charged to keep the thermostat running properly.
The battery charges in two ways: through your HVAC system running its heating or cooling cycle, or through a dedicated common wire — the C wire — that provides continuous low-voltage power directly to the thermostat.
When neither of those power sources delivers enough consistent voltage, the battery drains. And when the battery voltage drops too low, Nest enters a self-protection mode and displays the “Delayed” message — because it doesn’t have enough power to reliably fire your HVAC system without risking damage to the equipment.
According to Google’s Nest support guidance, a “Delayed” or “Starts in” message is one of the primary signs that your thermostat needs a C wire or the Nest Power Connector to maintain stable power.
That’s the root cause. Everything below is either a quick fix or a permanent solution to that power problem.
Fix 1 — Wait It Out (For Normal Compressor Delays)
Before doing anything else, check how recently your heating or cooling last ran.
If your AC or heat pump shut off in the last few minutes and you immediately asked it to start again — wait. The delay you’re seeing is compressor protection doing exactly what it’s supposed to do. Nest will count down and your system will start automatically once the pressure inside the compressor has had time to equalise.
This delay is typically 2 to 5 minutes. If the countdown reaches zero and your system starts normally — you’re done. Nothing is wrong.
If the delay keeps reappearing every time your system tries to start, or the countdown never reaches zero and just resets, move to the next fixes.
Fix 2 — Check Your Nest’s Power Levels (Takes 60 Seconds)
This is the diagnostic step that most guides skip entirely — and it’s the fastest way to confirm whether a power issue is actually causing your delay.
Here’s how to check it directly on your thermostat:
On Nest Learning Thermostat (1st, 2nd, 3rd gen): Go to Settings → Technical Info → Power. Look at the battery voltage reading. Anything below 3.6V means your thermostat’s battery is critically low and is the direct cause of the delay message.
On Nest Thermostat E or Nest Thermostat (2020 model): Go to Settings → Equipment → Power to find the same readings.
Normal battery voltage for a healthy Nest thermostat sits between 3.6V and 3.9V. If your reading is below 3.6V, your thermostat is starving for power — and the “Delayed” message will keep appearing until you solve the underlying power supply problem.
You’ll also want to look at the Voc and Vin readings here. If you have a C wire connected, both Voc and Vin should read between 29V and 42V. Anything significantly below that indicates a wiring issue or an underpowered transformer.
Fix 3 — Charge Your Nest Thermostat Manually (Quick Temporary Fix)
If your battery voltage is critically low, the fastest way to get your heating or cooling working again right now is to manually charge the thermostat using a USB cable. This is a temporary fix — not a permanent solution — but it gets your home comfortable while you work on the real underlying cause.
Here’s how to do it safely:
- Turn off power to your HVAC system at the circuit breaker first
- Gently pull the Nest display directly off the wall base — it lifts straight off
- Connect a micro-USB cable to the charging port on the back of the display
- Plug the other end into a USB wall adapter or a laptop USB port
- Look for a flashing red light on the display — this confirms it’s charging
- Leave it charging for 30 minutes minimum, up to 2 hours if the battery was fully depleted
- Reattach the display to the base and restore power at the breaker
Once charged, the “Delayed” message should clear and your system will respond normally. But here’s what matters: if the delay message comes back within a few days or weeks, your thermostat’s battery is draining faster than it’s being recharged through normal HVAC operation — which means you need a permanent power solution from the fixes below.
Fix 4 — Check Whether You Have a C Wire (The Most Important Fix)
This is the permanent fix that resolves the vast majority of recurring Nest delayed messages. The C wire — also called the common wire — provides a continuous, stable 24V power supply to your thermostat at all times, independent of whether your heating or cooling is running.
Without it, your Nest has to “steal” power from your heating or cooling wires — a method that works fine on some HVAC systems but causes power instability and persistent delay messages on others.
How to check if you have a C wire:
- Pull your Nest display off the base
- Look at the wire connectors on the base plate
- Find the terminal labelled “C” — if there’s a wire connected there, you have a C wire
- The C wire is almost always blue, though wire colours aren’t always consistent in older homes
If a C wire is already installed but you’re still getting delays: The wire may not be fully seated in the connector. Turn off your HVAC power at the breaker, remove the display, press the connector tab down firmly for the C terminal, and reseat the wire fully. Even a slightly loose connection can prevent the thermostat from receiving stable power.
If there is no C wire: Check whether there’s an unused spare wire running through your thermostat cable. Many homes have a 5-wire thermostat cable with only 4 wires currently in use — that spare wire can be connected as a C wire at both the thermostat and your HVAC control board. This is the cleanest permanent solution.
If you’re not comfortable working with HVAC wiring, this is the point where calling a licensed HVAC technician makes sense. The job typically takes under an hour and costs $75–$150 depending on your area — far less than dealing with a damaged HVAC system from repeated short cycling.
Important safety note: Always turn off power to your HVAC system at the circuit breaker before touching any thermostat wiring. This is low-voltage wiring, but your HVAC system itself runs on high voltage and requires the breaker to be off before you open any panels.
For a broader look at how to build a reliable smart home setup without common power headaches like this one, our Ultimate Smart Home Setup Guide on a Budget covers exactly how to get your devices playing nicely together from the start.
Fix 5 — Install the Nest Power Connector (No C Wire Available)
If your thermostat cable doesn’t have a spare wire to use as a C wire, you have two options: pay an electrician to run new wiring through your walls — which can be expensive — or install the Nest Power Connector.
The Nest Power Connector is Google’s own purpose-built solution for homes without a C wire. It installs at your HVAC control board — not at the thermostat itself — and taps into your system’s existing wiring to provide stable, regulated 24V power to your Nest thermostat. According to Google’s official guidance, you can request a free Nest Power Connector if your thermostat’s power test shows it’s needed.
Here’s what you need to know before installing it:
- Installation requires opening your furnace or air handler panel to access the control board
- You’ll need a screwdriver and basic comfort working near HVAC equipment
- The Nest Power Connector comes with step-by-step installation instructions in the box
- Always turn off the HVAC breaker before beginning installation
- If your system has multiple zones or a complex heat pump setup, Google recommends having a Nest Pro handle the installation
One important warning from Google’s own documentation: avoid third-party C wire adapters that claim to be Nest compatible. Some of them interfere with furnace control boards and fan relay signals in ways that can cause more problems than they solve. The official Nest Power Connector is specifically tuned to Nest’s internal power requirements, making it significantly more reliable on complex systems.
Fix 6 — Restart Your Nest Thermostat
If you’ve confirmed your power supply is adequate but the delay message persists, a firmware glitch can occasionally cause the thermostat to display a stuck delay message. A restart clears temporary software faults without wiping any of your settings, schedules, or learned preferences.
To restart your Nest thermostat:
Press the thermostat ring to open the Quick View menu → go to Settings → Reset → Restart. The thermostat will reboot — this takes about 1-2 minutes. Once it restarts, check whether the delay message has cleared.
If the delay returns quickly after restarting, the issue is definitely power-related rather than a software glitch. Go back to fixes 4 and 5.
Fix 7 — Check for a Firmware Update
Nest thermostats update their firmware automatically when connected to Wi-Fi — but if your thermostat has been struggling with power issues, it may have missed one or more updates while its Wi-Fi was disabled to conserve battery.
Outdated firmware can cause irregular delay messages and abnormal power behaviour on some Nest models. After charging your thermostat and confirming it’s connected to Wi-Fi, manually check for an update:
Go to Settings → Software on your thermostat display. If an update is available, select Check for Update. Your thermostat will download and install the update automatically, then restart. Give it a few minutes and check whether the delay message has resolved.
When the Delay Message Points to an HVAC Problem — Not a Nest Problem
Here’s something worth knowing that most Nest troubleshooting guides don’t address at all. Sometimes the delay message isn’t a Nest thermostat issue at all — it’s your HVAC system struggling to perform.
If you’ve solved the power supply issue, installed a C wire or Power Connector, confirmed healthy battery voltage, and the delay message still keeps appearing alongside symptoms like your home not reaching the target temperature — your furnace, heat pump, or AC unit itself may need attention.
Specific HVAC issues that cause persistent Nest delay messages include a failing pressure switch in a gas furnace, low refrigerant in an AC or heat pump, a dirty air filter restricting airflow and triggering high-limit shutoffs, or a faulty control board. In these cases, the Nest is responding correctly to signals from a struggling HVAC system — and the fix is an HVAC service call, not thermostat troubleshooting.
A good rule of thumb: if the delay message appears alongside error codes in the Nest app (like “HVAC fault” or “Heat pump stuck”), or if your system cycles on and off repeatedly in short bursts even after the Nest is properly powered, call an HVAC technician rather than continuing to troubleshoot the thermostat.
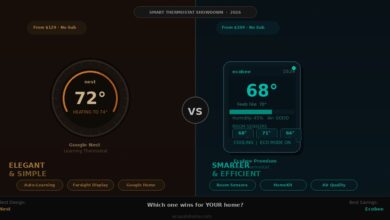
If you’re considering upgrading your thermostat entirely, our in-depth comparison of Ecobee vs Nest: Which Smart Thermostat Is Best in 2026? covers exactly which model handles power-sensitive installations better and why.
FAQ
Why does my Nest thermostat say “Delayed”?
The “Delayed” message on a Nest thermostat has two distinct causes. The first is normal compressor protection — after your AC or heat pump shuts off, Nest waits 2 to 5 minutes before restarting it to protect the compressor from short cycling damage. The second cause is a power problem — your thermostat’s internal battery has dropped too low to reliably control your HVAC system. If the delay appears when your system hasn’t recently run, or keeps repeating, a missing or faulty C wire is almost always responsible.
How do I fix a delayed Nest thermostat fast?
The fastest immediate fix is to manually charge your Nest thermostat using a micro-USB cable. Pull the display off the base, connect the USB cable to the charging port on the back, and charge it for 30 minutes to 2 hours. This restores battery voltage and clears the delay message temporarily. For a permanent fix, you’ll need to install a C wire or the Nest Power Connector to give your thermostat a stable continuous power supply.
Can the Nest delayed message mean my furnace is broken?
Sometimes yes — though it’s not the most common cause. If the delay message persists after fixing your thermostat’s power supply and is accompanied by your home not heating properly, your HVAC system may have a fault of its own. A failing pressure switch, low refrigerant, or a dirty filter causing high-limit shutoffs can all produce persistent Nest delay messages. If Nest app shows error codes alongside the delay, call an HVAC technician to inspect the system itself.
What is a C wire and do I need one for my Nest thermostat?
A C wire — short for common wire — provides a constant 24V power supply to your Nest thermostat at all times, regardless of whether your heating or cooling is running. Nest thermostats can technically operate without one by stealing small amounts of power from your heating and cooling wires, but this doesn’t work reliably on all HVAC systems. If you’re seeing recurring “Delayed” messages and your battery voltage consistently drops below 3.6V, installing a C wire or the Nest Power Connector is the definitive fix.
Is it safe to charge my Nest thermostat with USB?
Yes — charging your Nest thermostat via micro-USB is completely safe and is actually recommended by Google as a temporary fix for low battery issues. Always turn off power to your HVAC system at the breaker before removing the thermostat display from its base. Charge for 30 minutes to 2 hours until the red charging light stabilises, then reattach and restore power. This won’t damage the thermostat in any way.
Getting Your Nest Back on Schedule
A Nest thermostat showing “Delayed” is one of those problems that sounds alarming but is almost always fixable — once you know what’s actually causing it.
Work through the fixes in order. A 5-minute compressor protection delay is normal and needs no action. A recurring delay that clears after USB charging but comes back within days or weeks is telling you clearly that your thermostat needs a C wire or Power Connector for stable power. Get that sorted and the problem goes away permanently.
Once your Nest is running reliably again, it’s worth checking whether your broader smart home setup is optimised — a poorly positioned Wi-Fi router or an overloaded network can cause Nest connectivity issues that look like power problems on the surface. Our Ultimate Smart Home Setup Guide on a Budget covers the practical foundations that keep every smart device in your home running without constant troubleshooting.
A smart thermostat should make your home more comfortable — not more stressful. Now go get that heat running.