A smart apartment setup is completely achievable as a renter — without drilling a single hole, running a single wire, or asking your landlord for permission.
That’s the part nobody tells you. Most smart home guides are written for homeowners — people who can rewire switches, install permanent fixtures, and make structural changes without a second thought. If you’re renting, those guides are almost useless.
I’ve personally set up smart home systems in three rental apartments across four years. Every single device was installed without tools, approved by every landlord, and packed into boxes when moving day came. The system I’m about to walk you through costs under $200 to get started, works with Alexa and Google Home, and genuinely makes daily life better — not just more complicated.
Here’s everything you need to build a complete smart apartment setup, in the order that makes the most sense to do it.
Why Renters Are the Biggest Underserved Audience in Smart Home
Before jumping into the actual setup, it’s worth understanding why this matters beyond just convenience.
Most landlords allow smart devices that are plug-and-play, wireless, and removable. Smart bulbs screw in like regular bulbs and are completely safe for apartments. Battery-powered wireless doorbells can be mounted without drilling. As long as devices are removable and don’t cause permanent damage, the vast majority of smart home upgrades are completely renter-safe.
The Biggest Misconception Renters Have About Smart Homes
The problem is that nobody explains this clearly. Most renters assume smart home technology requires construction work — and most smart home guides don’t address renters at all. Consequently, the majority of apartment dwellers miss out on technology that would immediately improve their daily life, simply because of a misconception about what’s allowed.
Furthermore, when your lease ends, you can simply unplug renter-friendly smart devices and take your smart home with you to your next place. That portability is actually one of the biggest advantages renters have over homeowners — your entire smart home moves with you.
Step 1 — Start With a Smart Speaker (The Brain of Your Apartment)
Cost: $30–$100 | Installation: Plug into any outlet | Landlord approval needed: Never
The first thing to set up in any smart apartment is a voice assistant hub — either an Amazon Echo or a Google Nest speaker. Everything else in your setup connects to and is controlled by this device.
Amazon Echo devices work seamlessly in smaller apartments, with the compact Echo Dot fitting perfectly on nightstands or kitchen counters. Additionally, Google Nest speakers excel in larger rental spaces with their superior sound projection and multi-room synchronisation capabilities.
Choosing Between Echo and Nest for Your Apartment
For most renters, the Amazon Echo Dot (5th gen) at around $50 is the right starting point. It’s compact enough to sit on any surface without taking up meaningful space, sounds better than its size suggests, and gives you full Alexa voice control over every other device in your setup. However, if your household already uses Google services — Gmail, Google Calendar, Android phones — the Google Nest Mini at $30 is a better fit.
The tip that matters for renters: Buy only one hub to start. The temptation is to put a speaker in every room immediately, but your first priority is learning how the ecosystem works in your main living space. After your first month, once you understand which rooms benefit from voice control, adding more speakers makes much more sense.
If you want your smart speaker to run automations across your apartment automatically — not just respond to voice commands — our guide to Alexa Routines Ideas covers 15 specific routines that work perfectly in apartment setups.
Step 2 — Smart Plugs: The Cheapest and Most Impactful Upgrade
Cost: $10–15 per plug | Installation: Plug into wall outlet | Landlord approval needed: Never
Smart plugs are arguably the simplest and most effective way for renters to start with smart home automation. These devices plug directly into any standard wall outlet, and then you plug your existing appliances into the smart plug. There’s no wiring, no complicated setup, and absolutely no landlord approval needed.
A smart plug instantly makes any conventional appliance — a floor lamp, a fan, a coffee maker, a phone charger, a humidifier — controllable by voice or by schedule. Moreover, it’s the single highest-impact purchase per dollar in any smart apartment setup.
What to Do With Smart Plugs in Your Apartment
Here are the most useful applications renters get from smart plugs immediately:
- Floor lamp in the living room — turns on automatically at sunset, off at 11pm
- Coffee maker — starts brewing 10 minutes before your alarm
- Fan — turns off automatically when you leave home via geofencing
- TV power strip — everything powers down with one “Alexa, good night” command
- Phone charger — scheduled to stop at a set time to preserve battery health
The Kasa Smart Plug (EP25) and Amazon Smart Plug are the two most reliable options for apartment use in 2026. Both connect directly over Wi-Fi with no hub required, work with Alexa and Google Home, and cost around $12–15 each. Furthermore, buying a 4-pack gives better value — you’ll use all four within a week.
The renter-specific tip: Use smart plugs on your landlord’s appliances too — like a lamp they provided — not just your own. The plug is entirely your property. When you move out, simply unplug it and the lamp works exactly as it did before.
Step 3 — Smart Bulbs: Transform Every Room in 60 Seconds
Cost: $10–20 per bulb | Installation: Screw into existing socket | Landlord approval needed: Never
Smart bulbs rank among the easiest ways for renters to begin their smart home setup. A standard smart bulb screws into any existing light socket — no tools, no wiring, no modifications whatsoever.
Dimming your living room lights to 20% warm white for movie night, waking up to a gradual sunrise simulation, or setting different colour temperatures for work versus relaxation — these changes make an apartment feel genuinely different to live in. Additionally, the ability to control all your lights by voice from the couch is one of those small conveniences that sounds trivial until you experience it daily.
Three Levels of Smart Bulb for Renters
Level 1 — White bulbs with dimming (~$10): Brands like Sengled and WiZ offer white-only smart bulbs that dim from 1% to 100%. These are perfect for bedrooms and home offices where colour isn’t needed, but dimming makes a genuine quality-of-life difference.
Level 2 — Tunable white (~$15): Adjustable colour temperature from warm 2700K (cosy evening light) to cool 5000K (productive daylight). This is the best everyday upgrade for a living room or kitchen.
Level 3 — Full colour RGB (~$13–20): Govee, LIFX, and WiZ all offer full colour bulbs. These let you set any colour in any room — a blue-tinted environment for focus, warm amber for relaxation, or bright white for cooking.
For a complete comparison of which smart bulbs deliver the best value without a hub requirement, our guide to Philips Hue alternatives covers every major option at every price point — all of which work perfectly in rental apartments.
The renter-specific tip: Keep your original bulbs in a labelled bag. When you move out, screw the originals back in and take your smart bulbs with you. The process takes five minutes and guarantees your full security deposit.
Step 4 — Smart Thermostat (With Landlord Permission)
Cost: $130–$250 | Installation: Replaces existing thermostat — no new wiring in most cases | Landlord approval needed: Yes — ask first
This is the one category where you need a quick conversation with your landlord — but it’s a conversation worth having.
One of the things that makes Nest thermostats so convenient for renters is that they require no additional wiring in most homes. Most people complete the setup in 60 minutes or less. Furthermore, when it’s time to move, you uninstall it and take it with you to your next place.
Making the Financial Case to Your Landlord
The financial argument for asking is straightforward. A smart thermostat typically saves 10–15% on heating and cooling bills annually. In most apartments, that represents $100–200 per year back in your pocket — paying for the device within 12–18 months. Frame it that way to your landlord, and most are happy to agree. They benefit from energy-efficient use of their property, and you take the device when you leave.
If your landlord declines — or if your apartment has a complex HVAC system — a portable smart AC controller like the Sensibo Sky ($100) clips onto your existing window AC unit and adds Wi-Fi scheduling and remote control without touching any wiring whatsoever.
Always keep your original thermostat stored safely to reinstall when moving out. A labelled box in a closet works perfectly. This is the single most important renter precaution for this entire category.
Our detailed comparison of Ecobee vs Nest thermostats covers exactly which model is easier to install and remove in a rental context — and which one saves more money per year in a smaller apartment space.
Step 5 — Renter-Safe Security Without Drilling
Cost: $30–$80 per device | Installation: Adhesive mounts or free-standing | Landlord approval needed: Never for wireless cameras
Security is one of the areas where renters feel most disadvantaged — no ability to install hardwired cameras, no control over building entry systems, and no way to add a smart lock to a door they don’t own. The reality, however, is more encouraging than most people expect.
Indoor Cameras and Wireless Doorbells
Battery-powered security cameras can be placed indoors for motion alerts and live views — useful for monitoring packages or pets. The Blink Mini 2 and Ring Stick Up Cam Battery both deliver crisp 1080p footage with easy recharge and adhesive mounts that remove without trace.
If your apartment has a front door you control, a battery-powered video doorbell like the Ring Video Doorbell (battery version) mounts with an adhesive bracket or a simple screw into the door frame — not the wall — making it fully removable without permanent damage. For a complete overview of subscription-free options, our guide to Best Security Cameras Without Subscriptions covers exactly which models work best in rental setups.
Door and Window Sensors
Window and door contact sensors from Aqara or Samsung SmartThings attach with adhesive and send instant phone alerts when a door or window opens. No drilling is required, and they run for 1–2 years on a single CR2032 battery. These are particularly valuable in apartments where your front door connects directly to a shared corridor.
The renter-specific tip: Place indoor cameras facing your own front door from inside — not facing common areas, neighbours’ spaces, or shared hallways. This keeps you legally compliant and your landlord comfortable, while giving you exactly the security visibility you actually need.
Step 6 — Smart Lighting Strips for Instant Atmosphere
Cost: $20–$40 | Installation: Adhesive backing — peel and stick | Landlord approval needed: Never
LED light strips are one of the most dramatic visual upgrades available for any apartment — and one of the most renter-friendly, because they attach with peel-and-stick adhesive that removes cleanly from most surfaces.
Stick them behind your TV for bias lighting that reduces eye strain during long viewing sessions. Place them under kitchen cabinets for functional task lighting. Run them behind a headboard for ambient bedroom lighting that dims automatically as part of your bedtime routine.
Govee, Philips Hue, and LIFX all make Matter-compatible light strips that work with Alexa and Google Home without any hub. The Govee RGBIC strip at around $25 for a 5-metre roll is the best value option for apartments — it supports individual segment colour control, music sync, and full Alexa and Google integration.
The renter-specific tip: Never apply LED strips directly onto painted walls without testing the adhesive on a hidden section first. On textured or matte paint, adhesive strips occasionally pull paint when removed. Mounting strips on furniture — the back of a TV unit, under a shelf, or behind a headboard — avoids this entirely and looks equally good.
Step 7 — Water Leak Sensors (The One Most Renters Skip)
Cost: $15–$25 per sensor | Installation: Place on floor — no mounting needed | Landlord approval needed: Never
This is the smart apartment device almost nobody discusses — and it’s the one that can save you thousands of dollars.
Water leak sensors come in different forms. Some are small wireless probes that connect to a hub, while others are standalone plug-in models with moisture-detecting pads. Simply leave them under sinks and beside appliances where water shouldn’t appear, and you’ll receive an immediate phone alert if any moisture is detected.
Why Water Sensors Matter Specifically for Renters
In an apartment, a slow leak under your kitchen sink or bathroom vanity can go undetected for weeks. Consequently, this causes mould, structural damage, and a dispute with your landlord about who is responsible for the resulting repairs. A $15 water sensor placed under each sink sends an immediate alert the moment any moisture is detected, giving you time to stop a drip before it becomes a serious problem.
Place them under the kitchen sink, bathroom vanity, near the washing machine if you have one, and beside the toilet. They sit flat on the floor with no mounting required, run for 1–2 years on standard batteries, and connect to Alexa or Google Home for voice-accessible status checks.
The Complete Renter Smart Home Budget
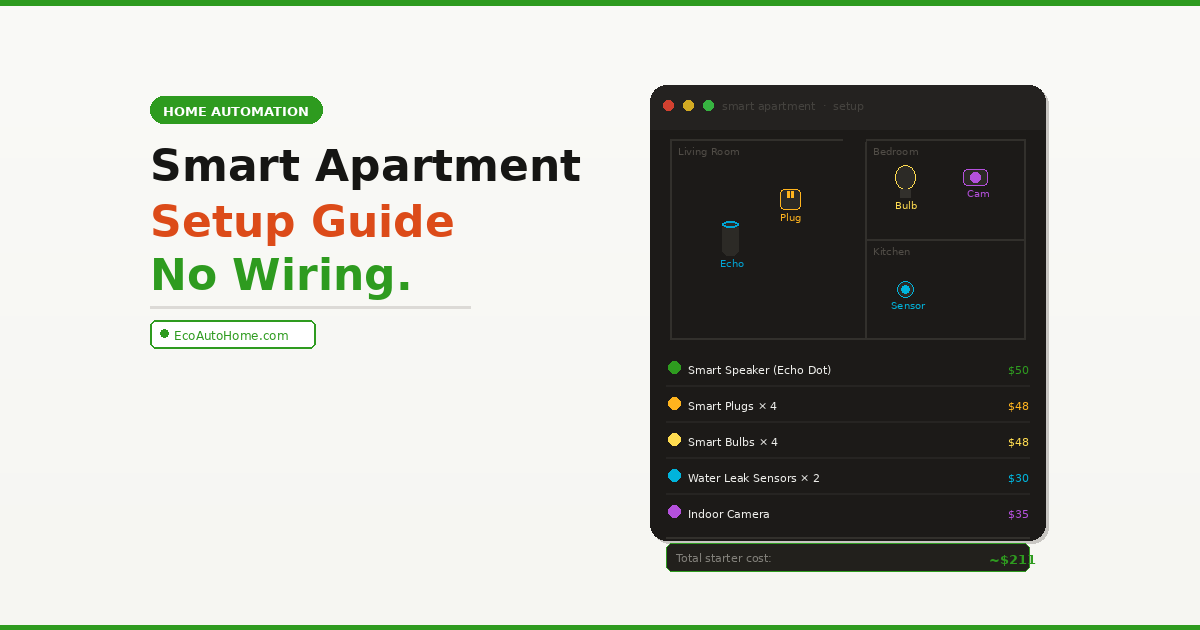
Here’s the full smart apartment setup built in priority order:
| Priority | Device | Cost | What It Adds |
|---|---|---|---|
| 1 | Amazon Echo Dot (5th gen) | $50 | Voice control hub — the brain |
| 2 | Smart plugs × 4 (Kasa EP25) | $48 | Automate any existing appliance |
| 3 | Smart bulbs × 4 (WiZ colour) | $48 | Lighting control and atmosphere |
| 4 | Water leak sensors × 2 | $30 | Protect your security deposit |
| 5 | Indoor camera (Blink Mini 2) | $35 | Apartment security |
| 6 | LED light strip (Govee 5m) | $25 | Visual transformation |
| Total | ~$236 | Complete smart apartment |
A smart thermostat adds another $130–250 if your landlord approves it — but the six items above give you a fully functional smart apartment setup that works from day one, packs into a single box when you move, and costs less than one month of a typical gym membership.
What to Avoid as a Renter
Most smart home mistakes renters make come from not knowing what’s reversible and what isn’t. Here’s what to skip entirely without explicit landlord approval:
Avoid smart light switches — they require opening your electrical panel and replacing existing hardware. Even if installation goes smoothly, reinstalling the original on move-out day without damaging the wall is harder than it sounds.
Avoid hardwired video doorbells — they require connecting to your building’s doorbell wiring. Battery-powered versions do exactly the same job without any wiring at all.
Avoid smart door locks that replace the existing cylinder — these require your landlord’s explicit permission and typically need a locksmith for correct installation and removal.
Avoid permanent wall-mounted speakers or displays — adhesive mounting damage to walls is one of the most common reasons renters lose security deposit money.
The core rule is straightforward: go with Wi-Fi and Bluetooth devices instead of anything wired or permanently mounted, and your smart apartment setup stays 100% landlord-safe.
FAQ
Can renters set up a smart home without landlord permission?
Yes — for the vast majority of smart home devices. Smart plugs, smart bulbs, smart speakers, battery-powered cameras, water leak sensors, and LED light strips all require zero landlord permission because they make no permanent changes to the property. The only category that typically needs landlord approval is a smart thermostat, since it replaces existing hardware. Everything else plugs in, screws into an existing socket, or attaches with removable adhesive.
What is the best smart home device to buy first for an apartment?
Start with a smart plug — specifically a 4-pack from Kasa or Amazon. At around $12 per plug with no hub required, a smart plug instantly makes any existing lamp, fan, or appliance controllable by voice or schedule. It’s the fastest way to experience real smart home value without committing to a larger purchase. After that, add a smart speaker so you can control everything by voice.
Will smart home devices work in a small apartment?
Yes — and small apartments are actually ideal for smart home setups. With everything in a compact space, a single Echo Dot or Nest Mini can hear commands from anywhere in the apartment. A single Wi-Fi router covers the whole space without dead zones. Furthermore, automations — like turning off all lights and plugs when you leave — are more impactful when they cover your entire living space simultaneously.
Can I take my smart home devices when I move?
Every device on this list is fully portable. Battery-powered cameras unmount from adhesive brackets cleanly. Water sensors simply lift off the floor. When moving day comes, everything goes into boxes in under 30 minutes, and your new apartment has a complete smart home setup from the moment you arrive.
Do smart home devices need a hub in 2026?
Not for the setup described in this guide. Smart plugs and smart bulbs from Kasa, WiZ, Govee, and Sengled all connect directly over your existing Wi-Fi — no hub required. Your Echo Dot or Nest Mini acts as the voice control centre, and the manufacturer’s app handles the rest. Matter-certified devices — increasingly common in 2026 — go one step further by working across Alexa, Google Home, and Apple HomeKit simultaneously from a single setup.
Your Smart Apartment Is One Weekend Away
The single biggest misconception holding renters back from a smart home is that permanent changes are required. They aren’t. Everything on this list plugs in, screws in, or peels off — and every single item comes with you when you move.
Start this weekend with a 4-pack of smart plugs and an Echo Dot. Get comfortable with voice control and a couple of schedules over the first week. Then add smart bulbs to your main living room and bedroom. By the end of your first month, your apartment will feel meaningfully different to live in — and you’ll understand exactly which devices to add next.
If you want to go further and connect your smart apartment into a complete ecosystem with routines running automatically throughout the day, our Ultimate Smart Home Setup Guide on a Budget covers exactly how to build out each room in order of impact. If you hit Wi-Fi connectivity issues as you add more devices — the most common technical problem in apartments with older routers — our Google Home Keeps Disconnecting guide covers the network fixes that keep every device reliably online.